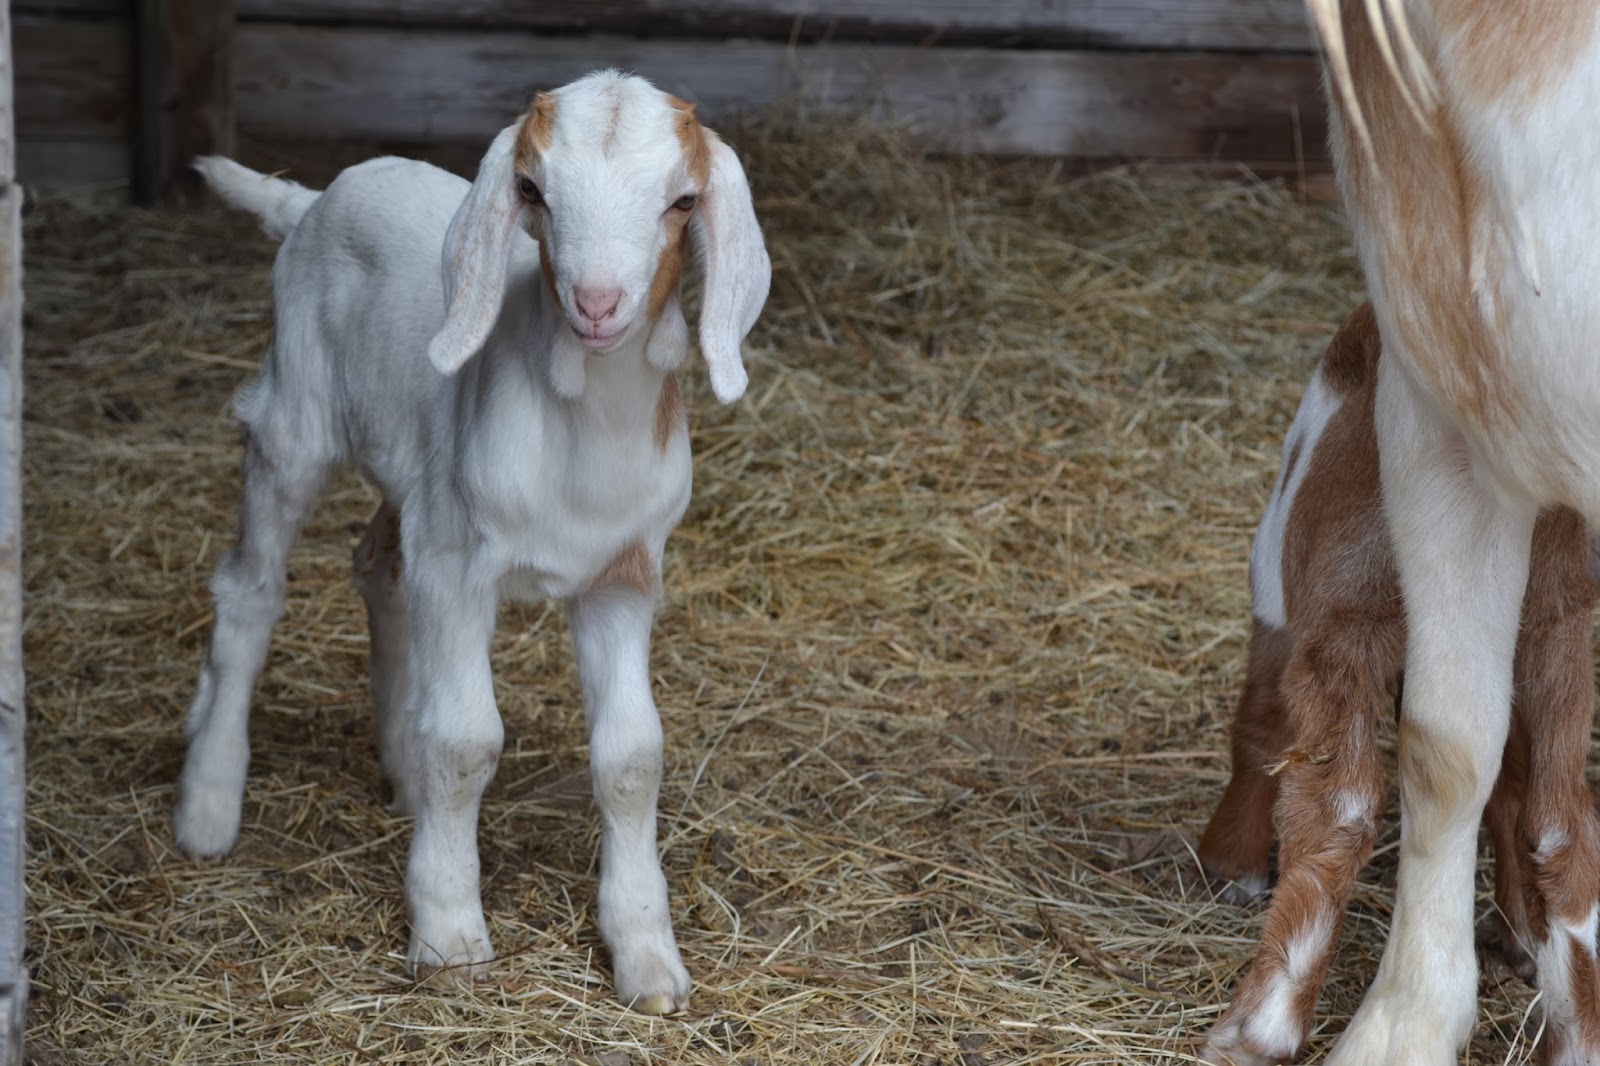
Just like to share pics of the new babies 'cause they're so cute.
Saturday, March 08, 2014
Friday, March 07, 2014
Feetie, For Warm Feet
Husband is an inventor, has several patents, and works with lots of patent lawyers. One of them sent me a gift...one of his own inventions.
It's like a Snuggie for your feet.
The package says it has "patented radiant barrier technology", that you can "take it anywhere", you can "Feetie with friends" (You know, sit around with your friends with Feetie on your feet. I plan on trying that this weekend), that "one size fits all" and that they are "warm and cozy", oh, and you may have "seen it on TV". Yes, I can attest to the fact that their advertising is true and correct. Well, except that I'll have to get my son-in-law to try it, because I'm not sure his feet will fit.
The Feetie even comes with instructions.
1. Sit or lie down in a comfortable position.
2. Place both feet fully within the Feetie comforter, and snap the opening closed between your legs. (Unless, of course, you're like me and like to cross your feet at the ankles or knees while they're resting on the ottoman).
3. Sit back, relax, and enjoy the comfort and warmth.
And, a warning!
1. Do not walk or stand while using your Feetie comforter. (I should have read that warning before I used my Feetie. Believe it or not, I did try to stand and walk with the Feetie on. I didn't crash and burn, merely shuffled along, but I can tell you that you do not want to forget that you have it on your feet and then try to get up and walk away.)
2. Never place the Feetie in a microwave oven. (I can assure you that I will not try to cook my Feetie, but someone out there just might.)
Now...if they'd just put a pocket for the remote control on it, it would be perfect.
What the Dog Drug Up.
We currently have two large skulls laying about in the yard that the dogs brought up and chew on from time to time. Ginger is still in her chewing puppy phase so skulls are not enough for her (and neither are boxes, boat covers, flower pots, plastic toys, old sheets and towels, etc.).
So, this is her latest chew toy.
Thank goodness, nobody is home.
Thursday, March 06, 2014
The Big Thaw
Whew, we just had a big freeze on Sunday with lots of sleet.
This looks like snow, but it was actually a hard crust of ice, in some places a couple of inches thick. I felt sorry for the birds so I tossed birdseed out onto the ice. We had tons of birds all over the yard. Of course, most of them flew out of sight every time I tried to take a picture.
We couldn't leave the house for about two days because the roads were treacherous. It stayed below freezing for more than 48 hours, which is unusual for east Texas.
It finally warmed up enough to thaw the ice and looks like spring. That's winter weeds, though, and not grass, so I'm not getting too excited. We still have a bit of winter to go.
The dogs are sunbathing.
Monday, March 03, 2014
The Midnight Trouble Makers
Two days old now and very active. They like to sleep under their heat lamp and stay cozy.
This is the one whose little ribs I felt in the uterus because she was blocking the way. What a sweet little face.
I'm thankful that the weather was not like it is today on that midnight run to the vet.
And here's that silly hen that was lost. She's quite happy in the barn. If she was sitting on a nest, the eggs won't be viable now because they'd have gotten cold while she's out gallivanting around.
Sunday, March 02, 2014
Bizarre, but Good!
Our Blue Andalusian hen is not gone after all!
We have all our pregnant does tucked away in the barn because they're all due to kid in the next few days and we're having below freezing weather and sleet.
I went out to the barn to do the last labor check of the night. When I walked in the barn, I heard a hen clucking...walked over to take a peek at the baby goats and there was the lost hen, just scratching around like she belonged there.
The only reason I can think of that she disappeared for that many days (aside from going on 'oliday) was that she has some eggs that she's sitting on up in the hay. She either lost interest or came down for some food and drink. I just left her in there. If she's gone again in the morning, at least I'll know where she is.
Yay!
We have all our pregnant does tucked away in the barn because they're all due to kid in the next few days and we're having below freezing weather and sleet.
I went out to the barn to do the last labor check of the night. When I walked in the barn, I heard a hen clucking...walked over to take a peek at the baby goats and there was the lost hen, just scratching around like she belonged there.
The only reason I can think of that she disappeared for that many days (aside from going on 'oliday) was that she has some eggs that she's sitting on up in the hay. She either lost interest or came down for some food and drink. I just left her in there. If she's gone again in the morning, at least I'll know where she is.
Yay!
Broody Hen
My Copper Maran hen (at least, I think that's what she is. She accidentally got thrown in with a group of Black Astralorp chicks last summer) appears to be broody. She's been sitting on a nest for three days. I decided to slip a few eggs under her yesterday. She tried to peck me, but didn't jump out and go running off in a huff. That's a pretty good sign.
Daughter-in-law has been thinking about trying to raise some chicks, so she might move this hen and her eggs into a separate cage and take over her care.
Unfortunately, I lost one of my hens this week. She was my one and only Blue Andalusian (such a pretty chicken) and I hated that I lost her. Coyote must have snuck up and took her because she has disappeared without a trace. I'm especially bummed because she had just become of age to lay eggs.
Saturday, March 01, 2014
Kidding Season
We started off the season with a bang this year.
I used an on-line gestation calculator on the ABGA (American Boer Goat Association) website to calculate the approximate due dates for each goat. Back in October, I took note of which doe was bred on which day. Billy kind of concentrates his efforts on one doe for a day or two, so I just observed them each day to, hopefully, get a more accurate due date for each of them.
Apparently, my method worked pretty good because yesterday was Pansy's due date and she went into labor at 7:00 last night. Usually, she has her babies when I'm not around and I just arrive to see her cleaning them up. As luck would have it, I went to check on her right after Wheel of Fortune and I could tell that she was in early stages of labor. So I stayed to watch, hoping to video it on my new GoPro camera. (That was not to be because I didn't have it charged and it died too soon).
Daughter-in-law came out to sit with me and watch the birth, but by 8:45 Pansy had birthed nothing but a bubble of the water sac, which burst and then...nothing. It was fairly anti-climactic. I remembered reading somewhere that if a kid is not born within an hour of the doe starting to push, then something was not right and someone would have to do something. By 9:45, no baby had made it's debut and that someone was going to have to be me. I did not want it to be me. I did not want to do something. Waiting for nature to take its course sounded like the best option to me. So, we waited.
10:45 and still no baby. So, Daughter-in-law went and got her iPad to do some googling for me. I had her go to the Fiasco Farm website first, because they're the kind of bible of all that is goat. That site said there should be a baby within an hour (that must be where I read that). Other sites said anywhere from 30 minutes to two hours, there should be a baby, otherwise, the babies might die or have brain damage from lack of oxygen. We were at the two hour mark, so it was time for action.
The websites said to get gloves, make sure hands or gloves were clean and feel around in the birth canal searching for feet. I don't know about anyone else, but that is not enough information for a novice like me. For those of you who are in this situation or might be in this situation in the future, read on. This experience doesn't make me an expert, but this information I sure could have used last night.
OK, so I got my rubber gloves and slathered them with Purell Advanced (Purell Advanced is the only hand sanitizer that really does kill 99% of germs. Tom had done the research back when the flu season started). I couldn't put it off any longer, so...I went in. Yes, I put my hand inside the vagina of a goat. This is the something that I did not want to do.
It was surprisingly easy. She was very slippery, so I didn't need a lubricant as the other websites had suggested. I was very timid, so I started out with just a few fingers. I quickly realized that more than a few fingers needed to go in and that, if a baby goat (or two or three) was going to come out of that canal, then surely my hand could go in.
So, in went the hand. I couldn't feel anything that felt like a baby goat part, least of all, bony little feet. I put my hand in a little past my wrist and this was where I really felt like I could use more information. How far is too far? How gentle did I need to be? Was I going to puncture some vital organ or poke and eye out?
I used an on-line gestation calculator on the ABGA (American Boer Goat Association) website to calculate the approximate due dates for each goat. Back in October, I took note of which doe was bred on which day. Billy kind of concentrates his efforts on one doe for a day or two, so I just observed them each day to, hopefully, get a more accurate due date for each of them.
Apparently, my method worked pretty good because yesterday was Pansy's due date and she went into labor at 7:00 last night. Usually, she has her babies when I'm not around and I just arrive to see her cleaning them up. As luck would have it, I went to check on her right after Wheel of Fortune and I could tell that she was in early stages of labor. So I stayed to watch, hoping to video it on my new GoPro camera. (That was not to be because I didn't have it charged and it died too soon).
Daughter-in-law came out to sit with me and watch the birth, but by 8:45 Pansy had birthed nothing but a bubble of the water sac, which burst and then...nothing. It was fairly anti-climactic. I remembered reading somewhere that if a kid is not born within an hour of the doe starting to push, then something was not right and someone would have to do something. By 9:45, no baby had made it's debut and that someone was going to have to be me. I did not want it to be me. I did not want to do something. Waiting for nature to take its course sounded like the best option to me. So, we waited.
10:45 and still no baby. So, Daughter-in-law went and got her iPad to do some googling for me. I had her go to the Fiasco Farm website first, because they're the kind of bible of all that is goat. That site said there should be a baby within an hour (that must be where I read that). Other sites said anywhere from 30 minutes to two hours, there should be a baby, otherwise, the babies might die or have brain damage from lack of oxygen. We were at the two hour mark, so it was time for action.
The websites said to get gloves, make sure hands or gloves were clean and feel around in the birth canal searching for feet. I don't know about anyone else, but that is not enough information for a novice like me. For those of you who are in this situation or might be in this situation in the future, read on. This experience doesn't make me an expert, but this information I sure could have used last night.
OK, so I got my rubber gloves and slathered them with Purell Advanced (Purell Advanced is the only hand sanitizer that really does kill 99% of germs. Tom had done the research back when the flu season started). I couldn't put it off any longer, so...I went in. Yes, I put my hand inside the vagina of a goat. This is the something that I did not want to do.
It was surprisingly easy. She was very slippery, so I didn't need a lubricant as the other websites had suggested. I was very timid, so I started out with just a few fingers. I quickly realized that more than a few fingers needed to go in and that, if a baby goat (or two or three) was going to come out of that canal, then surely my hand could go in.
So, in went the hand. I couldn't feel anything that felt like a baby goat part, least of all, bony little feet. I put my hand in a little past my wrist and this was where I really felt like I could use more information. How far is too far? How gentle did I need to be? Was I going to puncture some vital organ or poke and eye out?
I got in there far enough to feel what I thought was tiny little ribs. If that was the case, the baby was sideways across the birth canal and nothing was coming out and I decided that we needed some expert medical intervention and went to call the vet at 11:00 at night. She said to bring Pansy in and she'd meet us at the clinic.
So, I woke Tom up, he hooked up the trailer (no small feat in the dark), and Son helped me pull Pansy by the horns and hoist her up into the trailer. As you can imagine, she was not at all thrilled to be shoved into a trailer in the middle of the night in the middle of birthin' babies.
We arrived at the clinic at midnight. Dr. Missy (a new, young vet fresh out of vet school) slathered her arms (up past her elbows) with some sort of cleaning agent (meant to ask her what it was so I could have have some on hand).
(Unfortunately, I don't have any pictures of this because I forgot my camera and my iPhone pictures did not turn out well)
It turns out, the baby was, indeed, sideways and tangled up with her brother. The Dr. worked for 45 minutes sorting them out, turning them around and getting them out. Pansy was not happy and she bellowed loudly, but she did not try to get away or stop the doctor's activity.
The second kid was doubled over sideways and after a lot of digging around, the doctor pulled him out back feet first. Both kids are healthy and vigorous.
Tip #1: Be prepared to go in past your wrist. Dr. Missy had her entire arm inside the doe.
Tip #2: You do not need gloves. Just clean your hands real good. It is hard to know what you are feeling with gloves on. Clipping your fingernails is a good idea.
Tip #3: Don't be afraid to dive right in and sort out body parts. Find the two front feet, try to align the head up with the feet and PULL. Nice and steady. The preferred way is front feet first, but it is possible to pull it out by the back feet. Of course, you want to be as gentle as possible, but from what I observed, the doctor was rummaging around in there like a kid looking for his favorite toy in the toy box.
Tip#4: It is possible for the babies to survive at least three to four hours after the water breaks.
Tip #5: Have meds handy if possible. Penicillin to prevent infection, Oxytocin to help the uterus contract, and a tetanus shot. If you don't have them and it's the middle of the night, get them as soon as you can the next day.
Thanks to Daughter-in-law for hanging in there with me and taking pictures.
I need a nap.
Friday, February 21, 2014
Vardo, Part Four
Wallpaper!
The wallpaper finally arrived from Lowes.com. It's risky buying wallpaper over the internet because I really didn't know how the colors were going to turn out in real life. The "red" in the print turned out to be a little on the pink side, but it'll still look good with the planned red curtains.
It took me a day and a half to install the wallpaper in the slide-out. Thankfully, when I unscrewed the window trim, the windows didn't fall out on the ground.
I need ideas on covering the sofa. Possibilities (1) taking the cushions off completely and putting a futon mattress in it's place; (2) Making a slip cover. I don't really want to take off the old fabric and recover it. If I take it off, then it's off for good. The fabric is clipped on with really stiff wires underneath. Not fun.
In the meantime...curtains and crown moulding.
Tuesday, February 18, 2014
My Disgrace
So, my equine loving neighbor called me a few days ago. She said her farrier would be at her place this Tuesday (today) and could she have Pony's feet trimmed. Ah, there's nothing like a horse person noticing that you've neglected your equines. Yes, I have been neglectful. To my credit, I did notice that Pony could barely walk. I did check on her and made a mental note to myself to call the farrier. I did let a week go by without doing that (my terrible procrastinator self).
I deserved to be disgraced and I was. But...all is well. The farrier came over and trimmed Pony's feet and she's walking better already.
While the farrier was here, I was able to slip little donkey, Sophie, in there, too. Her feet were so long that I don't know how she could even walk, much less run (but she could and did). She was not happy about the feet trimming. After working on a very upset Pony for a while, they gave her a break and started on Sophie.
After quite some time of kicking and thrashing, the farrier and my neighbor (who was a great help) decided to lay her down....
I deserved to be disgraced and I was. But...all is well. The farrier came over and trimmed Pony's feet and she's walking better already.
While the farrier was here, I was able to slip little donkey, Sophie, in there, too. Her feet were so long that I don't know how she could even walk, much less run (but she could and did). She was not happy about the feet trimming. After working on a very upset Pony for a while, they gave her a break and started on Sophie.
After quite some time of kicking and thrashing, the farrier and my neighbor (who was a great help) decided to lay her down....
...and hold her down. Neighbor layed across her and held three feet in his hands while farrier clipped away.
This might look easy, but this was a moment of calm during several storms.
Sophie kicked and thrashed and flailed and got her head stuck in the fence. (Her head was behind neighbor's shoulder between the two fence slats). Everyone (but me because I was standing there, useless, taking pictures) was bloody by the time it was over. I've gotta hand it to them, neighbor and farrier stuck it out, stayed in a good humor, and got 'er done. When it was time to let her up, they had to pry her head out of the fence, scraping her eyelid in the process. Poor little thing.
Then, it was back to Pony. I don't have pictures of this because I felt like a dope standing there taking pictures while they were struggling with a rearing, jumping, twisting, falling, fit throwing Pony. I should have stuck it out, though, because it was really something to see. It's a good thing she's little or she could have caused some damage to life and limb.
But, it's done and I'm on the farrier's schedule, which works better for me since I put off phone calls to schedule those kinds of things.
Friday, February 14, 2014
Happy Avengers Day!
Liam attended a Valentine party today. The children exchanged Valentine cards and ate lots of sweets. This evening when we asked him what today is, his answer was, "Rebengers Day!"
Why would he think that?
Wednesday, January 22, 2014
Cajeta
I told people at the beginning of 2013 that it was my goal to save enough goat milk to last us through until the next milking season. But, frankly, I got tired of the milking routine and put an end to it earlier than I had planned. So, I thought I wasn't going to achieve my goal. But, with just Tom and I using the milk, it turns out that I did reach that goal.
Well, it's not milking season yet, but it will be pretty soon and I still have quite a bit of milk left in the freezer. I need to empty the freezer out to make room for the milk that my three milkers will produce this season, so I decided to make some cajeta.
Tom and I first read about this in an article about some Texans with a Nubian goat dairy farm. It is a Mexican sweet sauce, like caramel or dolce de leche (or so I'd read) and can be used to top all kinds of desserts, or just to eat with a spoon. It can be made with cow's milk, but I'm not sure why anyone would bother since cajeta is a goat milk thing.
It has to cook several hours and has to be watched and stirred diligently, so I waited until I was going to have a full afternoon to devote to it. In one article I read, the dairy that made it, presumably in large quantities, let theirs cook for about eight hours.
But, I wanted to start small, so I started with one quart of milk and it took me three hours from start to finish. I read several recipes and combined their collective knowledge in hopes of keeping it as simple as possible and hoping for a good outcome. It was surprisingly easy. The hardest thing about it was not being tempted to run off and do other things, risking burning the sauce.
Well, it's not milking season yet, but it will be pretty soon and I still have quite a bit of milk left in the freezer. I need to empty the freezer out to make room for the milk that my three milkers will produce this season, so I decided to make some cajeta.
Tom and I first read about this in an article about some Texans with a Nubian goat dairy farm. It is a Mexican sweet sauce, like caramel or dolce de leche (or so I'd read) and can be used to top all kinds of desserts, or just to eat with a spoon. It can be made with cow's milk, but I'm not sure why anyone would bother since cajeta is a goat milk thing.
It has to cook several hours and has to be watched and stirred diligently, so I waited until I was going to have a full afternoon to devote to it. In one article I read, the dairy that made it, presumably in large quantities, let theirs cook for about eight hours.
But, I wanted to start small, so I started with one quart of milk and it took me three hours from start to finish. I read several recipes and combined their collective knowledge in hopes of keeping it as simple as possible and hoping for a good outcome. It was surprisingly easy. The hardest thing about it was not being tempted to run off and do other things, risking burning the sauce.
The ingredients were:
1 quart goat milk
1 cup brown sugar (you can use white for a lighter sauce)
2 tsp. vanilla extract (not imitation)
1/2 tsp. salt
1 tsp. baking soda dissolved in one Tbs. water (or, one recipe suggested cow's milk instead of water. I'm not sure why)
Some recipes called for one cinnamon stick and some for rum, which is probably delicious and I'll likely try one of those the next time.
Bring all ingredients except for dissolved baking soda to a boil. Some recipes said to put all ingredients together in the beginning.
Use a wooden spoon to stir...something about reactions to metal, blah, blah, blah. Just do it even if you don't understand why.
I chose to add the baking soda after the sauce came to a boil.
Take the sauce off the heat and add the baking soda/water and stir like crazy because it really foams up and may bubble over.
After that, just put it back on the stove and simmer over low heat until it's done. The description of doneness was that it will thickly coat the back of a spoon and that while stirring, the spoon will leave a delayed trail and you'll be able to see the bottom of the pan for a second or two. If you like to use a candy thermometer, it's supposed to reach 220.
One quart of milk made exactly one pint jar of cajeta (with a little left in the pan for licking). And, they were right...it is delicious! I'm trying to think of things to put it on without getting too fat.
If you want to make this, see to it that you have plenty of things to do in the kitchen so that you won't be tempted to leave for a few minutes. Although, I was able to dash back and forth putting clothes in the washer/dryer, for the most part, I stayed in the kitchen and stirred. I was able to shred a block of peccorino with my new processor, clean the kitchen, surf the web, and cook dinner. I'd probably have a cleaner kitchen if I made this stuff regularly.
Tuesday, January 21, 2014
Boutique Pumpkins
My heirloom sugar pumpkins did so well this past season that I was able to give many away to friends and family. I also gave about a dozen to our favorite local cafe. So, I've decided the new thing for the garden this year is going to be boutique pumpkins. These are pumpkins that are different shapes and colors than the regular round orange ones. They can be used for fall decoration as well as cooking and eating.
I ordered several different kinds from Baker Creek Heirloom Seeds and they arrived in the mail today. I love ordering things on-line. Ordering gardening and farming stuff reminds me of a song we learned in high school chorus, The Wells Fargo Wagon
I tried to choose pumpkins that would look good together if they are used for decoration.
"Galeux d'Eysines"
pronounced "Gal-OH deh-ZINE"
Salmon peach colored skin, covered with warts.
"Flat White Boer"
This is a pure white pumpkin, but shows yellow in my lighting.
"Winter Squash Iran"
Foam green, mottled in soft peachy-orange.
Is it a bad sign that they don't actually have a picture of the pumpkin and someone had to draw it for the package?
"Marina di Chioggia"
Pronounced "ma-REE-na dee kee-OH-ja"
Deep blue green and warty.
"Jarrahdale"
Slate blue-grey.
And the seed company threw this in as a freebie. The package says it's a summer squash to be harvested all summer long. So, I guess I'll give it a try, too.
I'm hoping to have enough to sell at our local farmer's market that is open on Saturdays.
Sunday, January 19, 2014
Bye-Bye Oskar
For my birthday, Tom bought me a super-duper top of the line food processor to replace the 25+ year old Sunbeam Oskar mini processor that I had complained about this past summer.
We researched and read all sorts of reviews and finally decided upon the Breville Sous Chef food processor. It really was more money than I wanted Tom to spend, but after reading reviews, he insisted that this is the one I need, and I agreed.
I went from the little two cup capacity, two blade attachments to this 16 cup behemoth. (note to self: remove toilet paper from background in the future)
There's also a mini cup for smaller jobs that fits inside the big cup and at least eight different disks and blades for various chopping, slicing, and dicing. This should make the zucchini shredding and cucumber slicing a breeze this summer. There's even an emulsifying disk for making butter, which I can't wait to try. The directions claim that cookies, cakes, and milkshakes can be made in this thing.
So excited!
(Who says that women don't like to get kitchen appliances as gifts from their husbands?)
Saturday, January 18, 2014
Vardo, Part Three
Still waiting on wallpaper, so I reupholstered the dinette. This would have been a very quick project, but every time I hit a snag and things didn't line up just right, I got discouraged and stopped working on them. I didn't figure out a good system until I was working on the last cushion, which went together easily and quickly.
This is the before picture.
And the after.
These little white tab things are screws that hold the two trim pieces in place. I have to make covered buttons for them when I can find the proper parts. They don't sew on like conventional buttons, but snap on with a little plastic ring.
Sunday, January 12, 2014
Thursday, January 02, 2014
Vardo, Part Two
While I'm waiting for Lowes to ship the wallpaper that I ordered (weeks ago, grrr) for the walls of the slide out, I decided to go ahead and do the ceiling with a paintable vinyl wallpaper embossed with a tin ceiling tile pattern. It was on the shelf at Lowes and I just had to buy one roll.
This is what the ceiling looked like before I started. In the past, I've been very anti-wallpaper. I never wanted it in my house and never, ever wanted to install it. Bleh. But, it seems the cheapest, easiest way to go in the trailer, and cheaper than buying actual ceiling tiles. So, for my first wallpaper job ever, I'm doing a ceiling.
The area is thirteen by three feet, so I decided to install the paper in the direction of the short side, cutting several strips of three foot long wallpaper. I used my rotary cutter using the cutting mat as a straight edge. It worked great.
Zip, zip.
Even though this paper was pre pasted, I bought a tub of vinyl to vinyl paste and brushed it on with a paintbrush. It really was very easy and I have a ton of it left, so I'll be able to do the whole Vardo project without having to buy more.
My first strip!
And the finished install.
A few days later, when I was sure the paper wasn't going to fall off the ceiling, I painted it a dark grey.
I really liked how it looked with just the one coat of paint, but I thought I might be able to get a more aged look and more depth if I added a lighter grey on top. I used a sponge and just lightly swiped over the paper.
So, it's finished except that I might add a light coating of metallic paint.
Subscribe to:
Posts (Atom)