Welcome to Legal Tender Farm

Welcome to Legal Tender Farm

Friday, December 08, 2017

Master Bath Renovation Part Seven

We're in the home stretch!

To start at the beginning, go to Master Bath Renovation Part One.

So, about the crown moulding and Kreg tool.  No, it definitely did not work.  This was a horrible, horrible job for Husband.  Very frustrating.  After it was done, I told him, "Take that Kreg tool BACK!  It was absolutely worthless."  He did take it back today and it turns out that the one we got was defective...a piece missing or something like that.  So, I can't say whether the tool actually works or not.  I just know it didn't work for us.

There was one outside corner that was almost perfect (to the far right in this picture), but it took Husband an hour and a half to figure out that one piece and it was no thanks to the Kreg tool.

Here's the almost perfect corner up close and personal.


The inside corners weren't quite as difficult.  A bit of caulk fixed them right up.

But most of the corners were like this wonky catastrophe.  Nothing lined up at all, but we were at the point where we just didn't care anymore.  All I can say is, "thank goodness for caulk."  And, except for the fact that I just showed the world (or, my 60 something followers) that our corners are awful, I'm pretty sure nobody will ever notice.

 
Overall, the crown looks great.

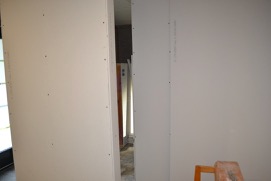
And, I'm very excited about the farmhouse door trim.  This was easy peasy.  Just several straight cuts, nail 'em up, call 'er done.

Also, an exciting milestone...tile!  The closets are painted and I just finished grouting the tile in the closets.  Man, that was a hard job.  I started it on my own while Husband went to his welding class and I certainly bit off more than I could chew.  Thankfully, he came home earlier than usual, or I would have been there literally all night.  As it was, it took me about five hours to lay less than half of this floor. And, it was a mess.  That night, I could barely walk.  My legs were shaky and I just went to bed dirty because I couldn't even stand up in the shower.  I creaked around like a 90 year old for a couple of days afterwards.  But, when we went to finish it, working together and getting into the groove of it, the job went somewhat faster and I didn't get as fatigued.  

We still have the rest of the bathroom to tile because we're tiling in stages.  There is no way we could have gotten this done all in one go.

But...progress, right?

To continue reading about my renovation, click on Master Bath Renovation, Part Eight.


Wednesday, November 29, 2017

Master Bath Renovation Part Six

To start at the beginning, go to Master Bath Renovation Part One.

We're still working on the bathroom and have made a lot of progress, but it's like two steps forward, one step back.

We were having major problems getting the crown molding cut so that it would fit together.  We pretty much gave up in despair on Monday.  Husband went to Lowes and bought a Kreg Crown Pro crown moulding jig tool.  He has a Kreg jig to make pocket hole joints which he uses all the time and was happy to see that they make a jig for crown moulding.  I'll let you know how it works...when we get to that.

In the meantime, just this morning, Husband was installing the last row of shiplap plank right along the ceiling.  Each piece has to be ripped down to about a two inch strip and will cover the studs that you can see at the top in Part Five.  These will be covered by the crown moulding and we had planned not to put planks there at all, but it turned out that we need to to have something to nail the crown to.  Anyway,  I was vacuuming up the dust from sanding joint compound in our new closets.  He went down to the barn to get something and there was a skunk in there.  Harry Dog grabbed the skunk, which is unusual because he has learned to stay away from skunks.  Well, either he forgot, or he thought it was an imminent danger.  When he grabbed it, it sprayed and got all over the barn.

As this bit of excitement was going on, the power in the bathroom suddenly went off.  Husband called me from the barn to tell me about the skunk, then I told him about the power.  He thought he might have hit a wire with a nail.  So, he came back up to the house, reeking of skunk, and took a couple of planks off the wall.  Turns out, he did not hit a wire.  So, he is currently investigating the mystery cause of the power outage and I'm pretty much stalled on my closet work, because...no power.  My plan was to put the first coat of paint on today, but now, I don't know.

So, how about some fall color?


These pictures really are beautiful, but unfortunately, you can't really tell because Blogger.com doesn't seem to care that pictures aren't clear on their site.

I need to scout around for a place to move my blog.  I'm getting really tired of blurry pictures.

Go here to continue reading about my Master Bath Renovation Part Seven.

Tuesday, November 21, 2017

Master Bath Renovation Part Five

Click on link to start at the beginning, Master Bath Renovation Part One.

We're moving right along, but, whew, this is taking a long time.  I'm officially in Thanksgiving mode this week, cooking and cleaning and getting ready to host Thanksgiving dinner, so I haven't done much on the bathroom.

Husband worked on the shiplap.  We ran out right towards the end.  NOTE:  if you're installing shiplap, make sure you buy extra.  By my calculations, we needed 47 12 foot planks.  I bought 50 just to be safe.  But, it turns out that we needed 2-3 more planks.  I was bummed that our work got interrupted.

Also, if you're a rank amateur wood worker, like us, and have outside corners that have to be mitered...hire someone or, if you don't have a compound miter saw, get one.  We bought Ariata pine nickel gap planks from Home Depot.  Many of them were warped and/or had a slight crown in them, when they should have been flat.  I didn't know this, but when you cut a board with a crown/hump in it, the cut comes out curved.  That was a nightmare.

We have crown moulding to install and we expect it to be harmful to our health.  So, husband is going to buy a compound miter saw before we ("we" meaning "HE") tackle that.  Hopefully, he'll be able to finish up the rest of the shiplap without having a brain aneurism.

So, this week has been mainly cleaning up in preparation for the holiday.  Husband finished up the electrical work and installed all the lights so that we could get the boxes out of the house.  And, he cleared away most of the tools so that we can now walk across the back porch.

I love seeing something done, even if it's just putting the A/C vent on the ceiling.

We got the damaged wood floor repaired by a friend.  I put the first coat of joint compound on the bedroom wall.  Since our drywall technique left something to be desired, we had some fairly big gaps and unevenness that I had to address.  Well, it's not totally our fault.  The original drywall was kind of wonky and that's what we had to work with.

The closet is all drywalled.

Another view of the closet.  I've put the first coat of tape and bedding, but this picture was taken before that.

The vanity lights.  I had planned on having four of these, but when I got them, they were waaay bigger than I expected and four of them would have been overwhelming.  I hope I didn't make a mistake keeping them.  But, they are pretty.

I'm loving this light fixture.  It is in the center of the room and husband put a two way switch on it so that it can be turned on and off from two locations - by the exterior door and by the bedroom/bathroom entry.  I got the ceiling and most of the walls painted before we installed the lights.  

The water closet (aka toilet room) light.  Call me crazy, but I'm kind of wanting it to look like an outhouse.  Bwahaha.  Husband said it was "cozy".  I'll take that as a compliment.

To continue to read about our master bath reno, go to Part Six.


Thursday, November 09, 2017

Master Bath Renovation Part Four

This is part four of our master bathroom renovation.  Go here to start at the beginning.

The plumbers got all the rough-ins done and the concrete poured last week.  Husband and I seemed to find a week's worth of extra stuff to do to get ready to have the insulation blown in.

One thing we did was install the door.  We ordered it from Lowes.com and it took about a month to arrive.  It's a Jeld-wen and was kind of a bear to put in, but we got it done.

I really, really, really wanted to raise our ceiling.  We have a lot of angles in the attic because of the shape of our roof.  I knew it would be hard.  I would have liked to raise it all the way up to the sloped roof joists, but would have been equally happy to just raise it to right above those flat joists and have exposed beams.

But, it became clear that it was just going to be too much work to have a high ceiling.  For one thing, our A/C ducts are old school, heavy metal pipes - not those soft ducts that I'm used to seeing in the attic.  It would have been a major undertaking to move them.  So, we're just going to be boring and having a regular height ceiling.

We took out all that nasty, nasty 40 year old fiberglass insulation.  I could not believe how much dirt had accumulated.  It's not a great insulator, either.

Dirt wasn't the only thing that accumulated.  This tragic little monster came down, nearly on my head, as I pulled out the attic insulation.  GROSS!  I bet you don't know what lurks in your attic, either.

Husband chose to have cellulose insulation blown into the walls and the attic.  Basically, it's just shredded newspaper, dampened slightly so that it will stay where it is blown.  

Doesn't it look nice and neat and clean?

To keep it in the attic, they stapled up this mesh.  We can just install the ceiling directly over that.

Next up was installing the cement backboard everywhere tile is going to be.  I chose Hardie Backer.  It seemed to be the favorite of the internet tutorialists.  This is something that Husband and I have never done.  And, I never want to do it again!  It was HARD.  Hence, the name HARDie.

I watched several video tutorials and also read the Hardie instructions.  See this video?  Lies.  All lies.  The instructions and tutorials said that you can just score the Hardie board, then snap it apart.    And for circle and square cut outs, you just score it and pop it out with a hammer.  No.  You can't.

I should have took more pictures.  But, this is what happens when you score and hammer.  We were only successful with one score and snap.  Husband had to kick it hard and the cut came out terribly jagged.  We ended up cutting it with a skilsaw (circular saw) with a diamond blade.  That's supposed to be a big no-no because of the dangerous dust that it produces.  But, really, there was no other way. Seriously.  We made the cuts outside and wore masks with filters.  That was a pain in the neck because they weigh a ton and had to be carried back and forth.  For the smaller cuts, we used a jigsaw with a WOOD cutting blade.  That works a treat, but it really wears the blade down quick.

It took us two full days to get all the Hardie backer installed.  But, it's DONE!  Yippee!

Look at that.  Isn't it beautiful?

I'm going to tile five feet up from the floor, then shiplap above that.

I'm excited to start the shiplap.  We got pre-primed Ariata prime 12 foot long boards from Home Depot.  They had the best price at this time.  And, I had to have the pre-primed because I just couldn't face painting the ceiling twice.

Go here for Part Five.


Saturday, October 28, 2017

Master Bath Renovation Part Three

This is part three of the reno.  Go here to start at the beginning.

We've been working all day, almost every day on this bathroom.  There really is a tremendous amount of work to be done, but it seems we didn't accomplish much this week.  That's what happens when you have to depend on someone else hired to do a job.  He hired a plumber for part of the work, so we are now at his mercy.

At the end of last week, we finished removing the tile and the thinset and mastic adhesives.

We took at chance on this adhesive stripper and it actually worked.  I mean, it was still hard work, but it softened both kinds of adhesive and made it marginally easier to scrape off.  
So, that's done.

Since the plumbers were going to saw out and break up concrete and we didn't want them tromping through our bedroom with chunks of concrete, we went ahead and made the hole in the wall for the new door, which hasn't arrived yet.

We consulted with a brick mason before we did this.  He made it sound like the bricks would come out easily, but that really wasn't the case.  Husband used a special saw blade to cut the mortar below the top row of bricks.  Then he used his compressor hammer to chip away the mortar to get the first few bricks out.  After he had a few out and I could carve out a little workspace of my own, I used the same hammer and chisel that I used on the tile to pry the brick loose from the mortar.

In my opinion, using hand tools for this job is far more effective than power tools.  I cleaned off each brick as we went and stacked them neatly for the brickmason to use when he repairs the area after we get the door in.  This took about six hours to accomplish.  It is possible for a woman to do it (because I removed a lot of the brick working by myself), but, believe me, a man can do it much quicker than a woman.  It takes physical strength.  And, let's face it, men are stronger than women.  Period.

Of course, it's been 80 degrees here, but as soon as we got a big gaping hole in the side of our house, a cold front blew in, with rain, and it was 31 degrees last night.   Husband had to scramble to cover the hole so we wouldn't die of exposure.

This is what the plumbers accomplished the first two days (Wednesday and Thursday) on the job.  They sawed a square in the concrete foundation, then broke it up with a jackhammer.  Plus, they took out the tub plumbing, moving the vent, the copper water lines, and the drain to their new locations for the shower.  They didn't come at all on Friday for some undetermined reason.

Hopefully, they will show up on Monday to complete the job either Monday or Tuesday.
Then, the FUN begins.  And, that is putting the bathroom back together - shower, tile, shiplap, vanities, lights...

YIPPEE!

Go here for part four.

Wednesday, October 18, 2017

Master Bath Renovation Part Two

It's been about four weeks and we're almost done with the demolition.  Every time I think, "whew, we're done tearing everything out," I realize that there is more to do.  I was out of town for a week, but Husband toiled away without me.

See where we started in Part One.

Husbands have the nastiest jobs.  We pulled the shower walls down and found the cause of the water leak.

Someone had previously done some work on the shower and cut out the shower liner.  We contacted the previous owner and she told us that she hired someone to replace it.  Unfortunately, he was an unethical contractor and didn't do what he was hired to do.  So, no liner causes leaks.  You can see in the picture above where it was cut.  The whole liner fold up the wall several inches like it does in the back and on the right side.  

Husband pulled up the wood floor to expose the rotted plywood underneath.

Then, rather than take all of the studs out, he cut the bottoms off and removed the rotted part of the stud, plus the 2x4 that the studs rest on.


Cutting out the rotted plywood underlayment.


All the studs hovering in mid air.

Rebuilding the studs.

To attach the 2x4's to the concrete floor, we used these 22 hammer gun things.  They literally shoot the nail through the wood and into the foundation.

Nail bullets.

The doorway on the left is framed so that we can put drywall over it.

All of the rotted wood is gone and wall studs repaired.

I'm constantly cleaning because I can't stand working in a mess.  I think every contractor should have a cleaner whose job it is to clean up constantly.  All of the contractors that have done work for me just have piles of junk laying everywhere.  I'd go on a cleaning frenzy when they left for the day.

While I was gone for the week, Husband framed our closets.

Voila.  Closets.  It doesn't look like much, but it was a whole week of work.  There will be no actual wall between them, but we have some IKEA cabinets that will be in the center and will divide the one space into two.

Ugh.  There is no easy way to take up tile flooring.  We tried several tools and I watched several tutorials that claimed "the easy way".  I hate to break it to ya'...there is no easy way.  In the picture above, he's using an air hammer with a wide bit.  This breaks the tile into little pieces and they fly all over the place.  Part of the tile has thinset under it.  It's the hardest to get up and, even though we got the tile up, the thinset is still stuck.  We're looking into renting a jackhammer with a blade on it to scrape it off, but our local tool rental place doesn't have one.

These were my tools of choice to remove the section of tile that was installed with a tile mastic.  It comes up easier and in bigger chunks, but most of the mastic is still stuck.  We have one section of tile left to do.  Then demolition is complete.

We bought this vacuum after we had pulled down most of the drywall and nearly choked to death on the drywall dust.  Theoretically, it sucks the dust from the air, but I'm not convinced yet.

One way we've been able to save a little money is by reusing the wood that we've taken out so that we won't have to buy any new lumber.  In fact, we're going to have a lot leftover.  We've carefully removed wall studs and doorway headers and have used them to build the very few walls that are necessary in my new bathroom plan.

All the walls except one small pony wall to form the shower are completed.  We can't do that one until we've cut out the foundation for the curbless shower pan and the plumbing is in.

Go here for Part Three of my master bath renovation.


Tuesday, October 03, 2017

Master Bath Renovation Part One

After nine years of living in the farmhouse, we are finally going to do the master bath renovation.  The previous owner did a cosmetic update with new tile, paint, and faucets, so it has looked OK.  But, I never have liked the "rabbit warren" look.  In the small space of 18' by 11', there are four doors and two doorways without doors.  It's a Jack and Jill style bathroom and dark, with one smallish window in the shower/toilet/tub space.  And, overwhelmingly beige.

The shower has been leaking for some time and is making the wood floor in the adjacent master bedroom buckle up.  So, there is lots of work to be done.  We're going to totally gut it, reconfigure, and rebuild.

Husband and I plan to do nearly everything ourselves.  Will we both come out alive?

Before pictures:

These are the two entryways.  One side for husband and his sink and closet and one side my sink and closet.  We're going to close up the doorway on the left and put the closets there.  The current shower backs up to that wall and the floor is buckling up where that mirror is.

Starting with my side.  My closet is just beyond my sink and is 5' x 6'.

Still with the original cabinets and countertop.

Looking through from the shower/toilet/tub room.   I'm going to eliminate almost all the walls and doors and put both sinks on the same wall.

The toilet niche.  This is the only thing that is staying where it is, but it will be enclosed with a door.  I like privacy in the privy.

This is the offending shower.  It is less than 36" square on the inside and we're always bumping our elbows.  It's a nasty den of mold and mildew, which is seeping out on all sides.  I just can't figure out why builders back then enclosed showers like this by lowering the ceiling.  Ick.  And, did I mention how much I hate these kinds of shower doors?  No doors on my new shower.

Opposite the toilet and shower is the tub with the window above it.  In nine years, we have never used this tub for it's intended purpose.  This is where my dirty clothes hamper has resided and the only time I have ever turned on the tap was to wash the tub out when it got so dusty and full of dirt dauber carcasses that I couldn't take it any more.

There is a small linen cupboard there, too, which cuts into Husband's closet space.  We all know that husband closet space is not the most important thing and that is why he has the smaller closet.

Husband's side with closet and a storage cupboard.

So, the demolition has begun.  When it came time to remove the tub, Husband took off the faucet handle.  He was having trouble with the little screw on the underside.  I got a magnifying glass and determined that there actually was no screw.  So, I said (because I've been watching bathroom demolition videos), "It's supposed to just screw off...like this."  As Husband was telling me that it won't screw off until we loosen the little screw underneath, I was unscrewing the whole faucet and it came right out in my hand.  See the little hole up there?  That's where it was.


Only, it wasn't supposed to unscrew quite like that.  Come to find out, the pipes had not been "sweated".  That is plumber speak for "welded together".  Basically, the copper pipe that the faucet was screwed onto was just stuck into the other copper pipe.  And, of course, it was leaking and rotting the studs behind the tile.

So, here we have the wall faucet and tile/drywall removed.  In the video tutorials that I watched, after this was done, the guy just easily lifted the tub up and out.  But, our tub would not budge.  So, we took out more wall to see what it might be stuck on.

Hello!  What's this?  It's dirt.  Dirt came pouring out of the wall.  Gross.


Husband had to take out the whole wall at the other end, studs and all, then shovel, shovel, shovel until we got enough dirt out so that the tub would move.  This is the dirt that is left after we shoveled enough to move the tub.  There is a concrete foundation under that dirt, believe it or not.  See, there is a little rectangular hole in the foundation that the plumbing comes up through.  Through the years, a mole or a gopher had dug under there and pushed dirt up through that hole.  I don't know why and I don't know how it possibly managed to do that.  But, it did.  That's gross, but it's not the grossest thing yet.

As we expected, the shower is totally rotting out.  

This is the wall next to the toilet.  I think it's going to be worse on the back wall where the wood floor is buckling up in the bedroom.  This is not the fun part of a bathroom renovation.

See Part Two of our master bath reno.