Welcome to Legal Tender Farm

Welcome to Legal Tender Farm

Thursday, September 24, 2015

Cream Separator

Well, I got scared of being out of butter some time in the future.  And, even though it is possible (maybe even preferable) to make butter without a cream separator, I decided to get one anyway.  I've read that it's not really worth the effort to separate goat milk with a cream separator, but I pretty much never listen to that kind of advice and I had to try it myself.

Not only did I buy a cream separator, but I bought a vintage cream separator.  And, not only did I buy a vintage cream separator, I bought a hand crank vintage cream separator.  Am I a glutton for punishment or what?

There were several to choose from, as the shop owner had bought someone's collection.  I had chosen a particular one because the crank worked smoothly as opposed to another one whose crank wouldn't turn.  But, Tom went with me to pick it up and asked to look at the "cones", which were rusted.  I thought, "big deal, who cares if the cones are rusted?" because I didn't know what the cones were for.  Quite frankly, I hadn't a clue how a cream separator worked.

Nobody told me that the innards of a cream separator look like this!  And, nobody told me that those cones are actually what separates the cream.  I thought they were just for weight to make the thingy spin. *color me pink*

Tom talked me into getting this Viking model, whose crank wouldn't turn, but the cones weren't rusted.  He assured me that he could fix the crank.  So we came home with the Viking, and indeed, he fixed the crank right up.  And I proceeded to clean all the little parts, all 21 of them.

So, for those as unfamiliar with a cream separator as I am, this is the part that all those cones fit onto and this is what spins when the crank is turned.

These are the cones.  They are keyed so that they fit on correctly.  We still don't know if they go on in a certain order, so I was very careful to put them back on in the order that they came off.  I guess I'll find out if this is right when I try to use it.

After I scrubbed all the years of crud off of the pieces, I fitted the cones back on the cone holder (I'm sure these have more technical names, but I don't have a clue).

All of them on.

Then the cover fits down over the cones.

This ring screws down over the top to hold it all together.

No, it does not emit bubbles.  My camera flash caused a reflection off the glass tiles.

Then the cone spinner thing fits down in the separator base.

All nestled in and ready to spin.

Then two trays with spouts fit on.  This is a magical machine and apparently, while cranking and spinning, cream comes out of one spout and the skimmed milk out the other.

The bowl sits on top of the spout things.
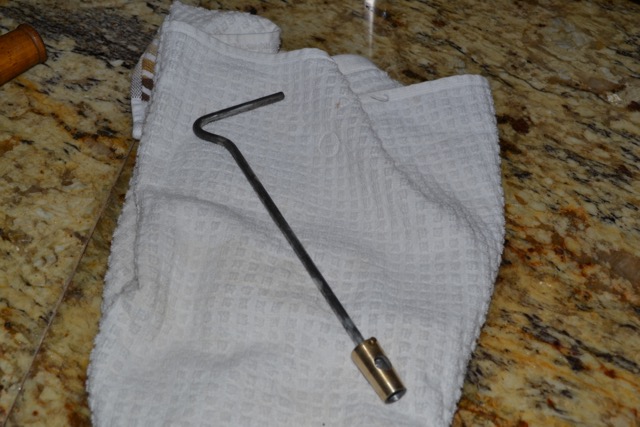
This gadget...

fits down in this hole in the center of the bowl/milk receptacle.

See how it has holes in it?  Those holes line up with the holes in the gadget.  To control the flow of milk going into the spinner, the gadget is turned so that milk flows through the holes.

This is Tinkerbell's bell (see, I told you it was magic).  It rings if you aren't cranking fast enough.  "Ring, ring, ring, crank faster, crank faster!"

Gadget in hole.

Assembled and awaiting milk and cranker.

I can't wait to try it.  But, I am not looking forward to cleaning it again and again.


Wednesday, September 23, 2015

Hose Hangers

Hoses are a big part of farm life.  Huge.  We have lots of them and use them everywhere.  There's no easy way to store them or tote them, at least, for me there's not.  They're heavy and unwieldy.  We have all kinds of hoses and all kinds of holders and hangers.

We have a couple of these freestanding ones that stake into the ground.  They're OK, but tend to lean forward after a while because of the weight of the hose.

We have this horrible, horrible contraption.  It seems like it would be a good idea...

but, the hose doesn't unwind easily and you never know what kind of wasp nest is going to be up under the lid when you lift it.

We have a few of these.  They pretty much ensure a tangled mess.

Here's one free of it's hose, which is stretched out across the field on stand-by for watering the orchard at the moment.

This one is moderately useful.  It takes a lot of strength to roll it up and drag it around, but at least it has wheels which make transporting it from one spot to another a little easier than carrying the hose.  

This is Tom's compressor hose in the garage.  This hanger is a pretty good design.  

It has a little door in the front that opens up a compartment where he keeps extra nozzles.  Kudos to this hose hanger designer.  Tom has it installed too high for it to be of any use to me.

So, here's the latest and greatest.  I bought them at the flea market, but you can find them on-line.  They're called GeckoToes.  They make them for water hoses, compressor hoses and extension cords.

This is my compressor hose.  I used to keep it in a big plastic bag that zips closed because I want to keep it clean since I drag it through the house for my upholstery projects.  But it's very long and hard to wind up.  It's nice because it hangs pretty flat against the wall and the hanger keeps the hose from getting tangled.  Theoretically, you're supposed to be able to just pop as much length out of the "toes" as you need.  If I find that it gets too dirty hanging there exposed, I'll have to make some sort of cover for it.

I also got one to try out for one of the water hoses.  You can mount them on brick, but it makes me a little squeamish to drill into brick or mortar, especially since our brick is the Antique Chicago brick and has a tendency to crumble.  I just mounted this one on the fence near a spigot.

So far, so good.


Monday, September 21, 2015

The Spillway

Tom finally got the time to repair the spillway on our pond dam.  Our ever helpful neighbor came over with his big equipment and they buried two big pipes (or culverts) and rebuilt the area that was washed out in the big flood this past spring.


Since it had been washed out, Tom hasn't been able to get the tractor over to the other side of the pond to mow, so it is completely taken over with weeds.  As you can see, the water has receded significantly.  It will probably be quite a while before the water is high enough to go through those pipes.

Tom needed to put concrete around the ends of the pipes to keep the the soil from being washed away the next time we have a gully washer.  He was faced with mixing 24 80 lb. bags of concrete by hand in a wheel barrow.  Thankfully, a friend loaned Tom his tractor with a cement mixer on the back.  So, he was able to mix the concrete right on the site using the water from the pond.  It was still backbreaking work to lift all of those bags of concrete and pour them into the mixer.

This doesn't look like 1,920 pounds worth of concrete!

Hopefully, some grass will grow over that bare spot to hold the soil in place.