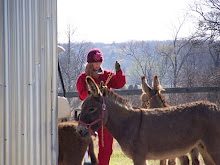
In all these years of kidding seasons, I have never witnessed movement of the babies like this. I'm glad I was there with my phone to capture the moment. Usually, it's just gentle waves of movement that may or may not be the rumen. There was no doubt what this was in Pansy's tummy. She didn't kid until several days later and, even though I thought she'd be first to kid, she turned out to be next to last.
Wednesday, March 16, 2016

Wednesday, January 27, 2016
How the Mighty Have Fallen
We have the rooster, Tubby, who has been with us since the beginning. When we had our first flock of Rhode Island Reds we kept two roosters , Tubby and Hubby. Tubby was the King of the Coop and regularly attacked Hubby until Hubby was killed by the neighbor's dog.
For a while now, we've had a Black Astralorp rooster named Blackie (original, huh?). He is very fine looking, but Tubby has kept him in his place for the past two or three years. The balance of power has now shifted. Tubby is old and lame. He's was still very fine looking until Blackie figured out that he is BMOC now. He started attacking Tubby in the mornings and evenings while they were in the coop. He pulls out his tail feathers and jumps on his back, tearing up Tubby's comb. Poor guy, his head is all torn up, comb deflated, and there is blood in each corner where he has huddled trying to protect his head from Blackie.
Tubby is no longer allowed to be anywhere near the hens, so I've tried to minimize his humiliation and misery. When I feed the chickens in the evening, I go ahead and lock them up in the yard, shutting Tubby out. He's on his own to find a safe place to spend the night, but I figured it was better than being attacked every night. I think he's sleeping in the mower shed, which is where I put his own little stash of scratch for him to eat. Since I've been locking him out of the coop, his head comb is healing and the feathers on his head are growing back. He's even getting a few of his tail plumes back.


For a while now, we've had a Black Astralorp rooster named Blackie (original, huh?). He is very fine looking, but Tubby has kept him in his place for the past two or three years. The balance of power has now shifted. Tubby is old and lame. He's was still very fine looking until Blackie figured out that he is BMOC now. He started attacking Tubby in the mornings and evenings while they were in the coop. He pulls out his tail feathers and jumps on his back, tearing up Tubby's comb. Poor guy, his head is all torn up, comb deflated, and there is blood in each corner where he has huddled trying to protect his head from Blackie.
Tubby is no longer allowed to be anywhere near the hens, so I've tried to minimize his humiliation and misery. When I feed the chickens in the evening, I go ahead and lock them up in the yard, shutting Tubby out. He's on his own to find a safe place to spend the night, but I figured it was better than being attacked every night. I think he's sleeping in the mower shed, which is where I put his own little stash of scratch for him to eat. Since I've been locking him out of the coop, his head comb is healing and the feathers on his head are growing back. He's even getting a few of his tail plumes back.

I guess he's lonely because he has taken to hanging out with Harry during the day. Here he is sunbathing and napping with Harry. He even hangs out with me while I garden.

Harry doesn't mind the occasional peck.


See how he has his foot lifted up. He does this all the time...picks his foot up and shakes it.


He does it with both feet and one of his legs is very bent. I recently did some googling and I'm thinking he might have scaly mites. I'm going to try treating him for it and see if it helps.
Friday, January 15, 2016
Chicken Coop Remodel Update
I wanted to do an update on the chicken coop remodel after living with it for a while. It has been great! It's so much easier to keep clean.


Since my last post about the chicken coop, we made a couple of changes. Husband installed a roost on hinges. I can lift this up to clean if I need to. We also added a dropping board underneath the roost. We just used some old closet doors because that's what we had and they were the right size. Ideally, a dropping board wouldn't have seams for gunk to get stuck in, but this was a trial. I may make a proper one covered with linoleum at a later date since this one has worked out so well. I scrape it down every day with a wide tool that is made for spreading tile adhesive. Then I use a kitty litter scoop to pick up whatever droppings are left in the sand overnight.
Since making this change with the sand on the floor and the dropping board, the chicken coop never stinks.

A new issue was that several chickens decided to roost in the nesting boxes. This is not good. When they sleep in the nesting boxes, they poop in them all night. Then during the day when they go in to lay their eggs, they lay them in the poop. Ugh. Eggs with poop stuck to them is gross!
I've been mulling it over for some time and searching through Pinterest for solutions. One chicken owner actually made curtains for her nesting boxes to discourage the chickens from sleeping in them. I seriously considered that, because, how cute is that...curtains on the nesting boxes and one on the window to match? ooh...ahhh!
But, how long would that last? They'd have to be washed and replaced. Nah. Not for me. So, I had this idea...just drape a sheet over the whole unit. Pull it up in the morning, then let it down at night. In the above picture, I've got it up for the day.

Then, I do this for the night. The hens have no access either to the boxes or the roosts outside the boxes. Last night was the first night for covering them. Everything seemed to go well. The nests are still squeaky clean. I think this is a good solution as long as we can remember to raise and lower the sheet each day. Maybe after a while the hens will break the habit and we won't have to cover it anymore.
Friday, December 25, 2015
DIY Ottoman #2
My living room is in a state of flux. I'm slowly changing it's look and working towards replacing all of the furniture. I still have the Chesterfield sofa in the barn that I'm planning to reupholster, but it's on the back burner for the time being. I plan to work on that this winter. You might be thinking, "It is winter." But, hey, as I sit here typing, it is 77 degrees outside and my azaleas, roses, and irises are in full bloom. No wonder I'm confused.
Anyway, daughter found this old table at an estate sale for me. I was actually looking for a round one in this style, but I thought having an octagon would be interesting.


Anyway, daughter found this old table at an estate sale for me. I was actually looking for a round one in this style, but I thought having an octagon would be interesting.

It's sort of Louis XVI meets the 80's.

Once again, five inch foam. Luckily, the table is short enough so that putting this big chunk of foam doesn't make it way too tall...just barely.

I cut the top to fit, allowing for a half inch seam all the way 'round. By the way, I found this fabric at Hancock Fabrics and I loved it right away. However, I didn't realize how much purple it had in it until I got it home. Hmm. Not loving how the purple in the fabric clashes with the red in the rug. And, you know why this isn't working for me? Because I don't love the rug. Never loved the rug. Even less so now. I bought it because I was desperate for a new rug in the living room and this one was a decent price for the size I needed in the color family that I needed. On-line, the red didn't look so red and I thought it would be neutral enough to work with the other ideas I had. That's what happens when I ignore my own rule about decorating with things I love. Why do I keep having to learn this lesson over and over?

So, anyway, I went back and forth on this...cut one strip to go all the way around the sides, or cut each of the eight sides individually and have seams at all corners. I opted for the eight pieces so that the corners would be crisper instead of looking like a round cushion on top of an octagonal table.
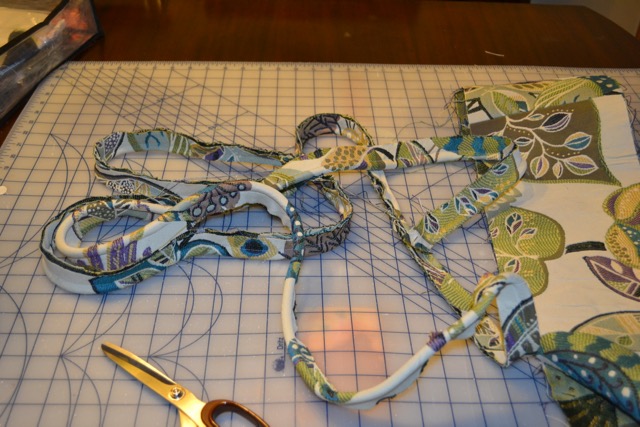
More welting. Man, am I ever glad that I found this tutorial on making bias tape for welting. It saves a whole bunch of time and is so easy!

Self welt on the top of the cushion. contrasting welt on the underside to cover the rough edges.

Basically finished, except that I'm going to put four large buttons and very slightly tuft the top with them. I've learned that the buttons I can buy at the fabric store are really not that great of an option for upholstery. The fabric is too thick, it's hard to put the buttons together and they come apart too easily. From now on, I'm either going to have buttons covered for me at an upholstery shop or find some better quality buttons that I can cover myself.
Now. What to do about that red. Ugh. Does anyone know if I can paint a wool rug with fabric paint?
Ottoman DIY #1
Whew! I've been busy, folks. After chalk painting that old dresser, I got busy on this coffee-table-turned-ottoman for my daughter-in-law's birthday present.


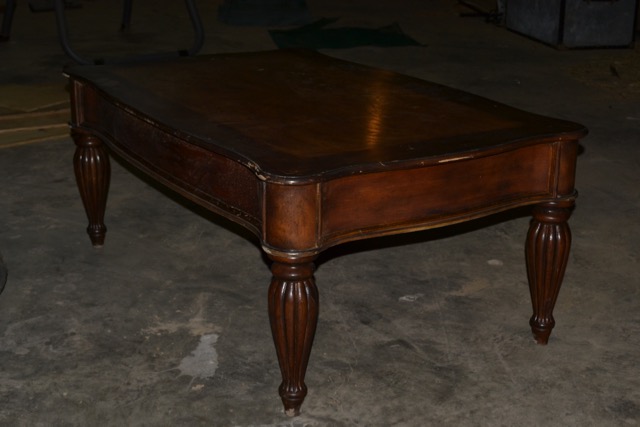
I found this coffee table at the flea market. Coincidentally, my son and daughter-in-law need a coffee table and I need a project.

It had this interesting pattern on the top that I thought might be fun to try to ceruse.

But, I couldn't find any liming wax locally.

And, daughter-in-law wanted a deep tufted upholstered top.

So, I stripped it down in preparation for painting it. I stripped it before I discovered the chalk paint, then wished I hadn't gone to all the trouble of stripping when I could have just painted over the finish that was on it.

So, painted the bottom, shellacked the top. Even though the top was destined for upholstery, I though it should have a finish on it. Just in case...whatever.

I thought I could simply drill holes in the top and tuft the foam and fabric right onto the table top, but I realized that wasn't going to be possible. There was no direct access to the actual top because of the box-like structure and the drawer. So, I tufted it on a piece of plywood first.

Then attached the plywood to the table top.

Then, uh-oh. I didn't think ahead when I was ordering the five inch thick foam. It made the coffee table ottoman way too tall!

Look at that! Giant ottoman.

Solution. New legs. Little legs. Painted and waxed.

Double welting hot glued to cover the rough edges. Note the box construction of the table that prevented the tufting.

Welting finished.

Voila!
Wednesday, November 18, 2015
Dresser Redo
I have a couple of pieces of furniture that I needed to redo and while searching for various ways of refinishing, I came across a tutorial on using chalk paint. Since we live near the flea market, which is a DIYer's paradise, I was well acquainted with antique furniture painted with chalk paint and I love the look. But, I didn't have any idea about how it was done. I imagined that it was the same ol' process of stripping and sanding like anything else.
When I read the tutorial, I was very pleasantly surprised to see that just about any surface can be painted with chalk paint without having to be stripped. That was the deciding factor for me. I found a local "stockist" for Annie Sloan chalk paint and went to buy my supplies, which included the chalk paint in Pure White, wax, and a wax brush applicator, right away.
Here's the first piece of furniture I wanted to get done.

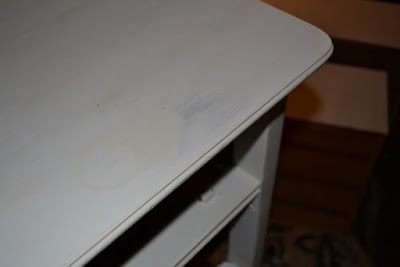


When I read the tutorial, I was very pleasantly surprised to see that just about any surface can be painted with chalk paint without having to be stripped. That was the deciding factor for me. I found a local "stockist" for Annie Sloan chalk paint and went to buy my supplies, which included the chalk paint in Pure White, wax, and a wax brush applicator, right away.
Here's the first piece of furniture I wanted to get done.

I decided to set up in the house since I wasn't going to have to use stripping chemicals and I preferred to do this in the comfort of my home instead of out in the barn. I laid plastic down to protect the rug. Then I washed the whole dresser down with TSP (trisodium phosphate). Boy, was it dirty!
I'm not going to do a tutorial because there are plenty of those on Pinterest, but I do have one important tip. The Annie Sloan website says that some pieces of furniture from the 1930-40's era have a finish that may bleed through the chalk paint and if this happens, to just paint it with a coat of shellac, let it dry (it takes just a few minutes), then paint over it and that should stop the bleed through. Well, being me with my attitude of "it won't happen to me" and "hurry up and get to the final reveal", I ignored that warning. If you never listen to a word I say, at least listen to this...if you're going to paint a piece from that era, go ahead and paint on the shellac. Just do it.

Here's a picture of the top with two coats of paint. The original finish was still bleeding through.

So...thankfully, I had bought some shellac for another project I thought I might do. I put a quick coat on over the paint. When it dried, I put another coat of paint over it. For the top, I did a light sanding and put yet another coat of paint just for good measure.

After painting, I applied two coats of the Annie Sloan wax and did a light buffing.

The wax gives it a nice glow. I think if I used my electric buffer, I could have gotten it a little glossier.

I lined the drawers for a little pizazz.
All done. I finished this dresser in four days with lots of breaks in between. If you have the uninterrupted time available, this could probably be done in one or two days.
This was a seriously easy project with instant gratification....right up my alley. I just might be chalk painting everything in sight.
Friday, November 13, 2015
Yard Birds
Only one of Broody Hen's chicks survived her last broody episode. I took it from her when it was a couple of days old because she had killed two others. I didn't want her to kill the last one. It had hatched at about the same time the guineas hatched, so I took five guinea keets and the one chick and raised them together in the guinea coop. The guineas have a way of disappearing one by one and I wanted to make sure that at least the unusually colored ones survived, so those are the ones I took.
After we got the chicken coop remodeled it was time for the chick, who thankfully turned out to be a hen instead of a rooster, to be integrated into the flock. I put her in a cage and kept her in the coop for several days. Integrating her in that way had two benefits: (1) Chickens are mean to each other, especially when there's a new chick in town. Keeping her in a cage kept her safe from the bigger hens pecking her, but allowing them all time to get to know each other. (2) Keeping her in the coop for several days "coop trains" her so that she knows it is her home that she will come back to each night after free ranging all day.
The coop training worked, but the hens are still mean to her. She's pretty much a loner, except when she hangs out with old Tubby, our original Rhode Island Red rooster. He's nearly eight years old now and is showing his age. He's still big and glossy, but not nearly as grand as he used to be. He limps, doesn't have his beautiful arching tail feathers, and the ruff around his neck is looking a little more "rough" than "ruff". So, he doesn't go as far afield as he used to. He mostly stays close to the coop.


After we got the chicken coop remodeled it was time for the chick, who thankfully turned out to be a hen instead of a rooster, to be integrated into the flock. I put her in a cage and kept her in the coop for several days. Integrating her in that way had two benefits: (1) Chickens are mean to each other, especially when there's a new chick in town. Keeping her in a cage kept her safe from the bigger hens pecking her, but allowing them all time to get to know each other. (2) Keeping her in the coop for several days "coop trains" her so that she knows it is her home that she will come back to each night after free ranging all day.
The coop training worked, but the hens are still mean to her. She's pretty much a loner, except when she hangs out with old Tubby, our original Rhode Island Red rooster. He's nearly eight years old now and is showing his age. He's still big and glossy, but not nearly as grand as he used to be. He limps, doesn't have his beautiful arching tail feathers, and the ruff around his neck is looking a little more "rough" than "ruff". So, he doesn't go as far afield as he used to. He mostly stays close to the coop.

I call this chick Shaun, after Shaun the Sheep. Why? Because, either by injury or birth defect, her beak is wonky and reminds me of how Shaun the Sheep's mouth in the Shaun movies.
Double click the pic to see her wonky beak. I'm surprised she can eat or drink, but I guess she's doing just fine.
And, for some reason, she is very personable. When I go out to clean the coop, she runs to me, getting in my way, and even jumping up on the roost so she can be right in my face, like a parrot, as I clean the roost area.

Tubby in the foreground with his stubby tail towards the camera, and Shaun in the background.
As for the other yard birds, the guineas, I kept the young guineas in the guinea coop until they got most of their grown up feathers, then I opened the door to let them come and go as they please. Since then, two have disappeared. We have a predator that is picking them off, but we don't know what it is yet. We've also lost three of the adults in the past month or two. I suspect a coon that can get up in the tree at night while the guineas are sleeping and the dogs can't do anything about it if it's happening up in a tree.

This silver guinea is the one I really want to survive. I want to see what she looks like all grown up. We had one hatch last year, but it disappeared right away. The only way I could think of this year to ensure its survival is to keep it penned up until it was big enough. But, still, there is no guarantee.
Friday, October 30, 2015
Vardo, Part Five
Hey, after, what? nearly two years? I've finally started up work again on the Gypsy Vardo. Well, to be fair to myself, I had started sewing the curtains some time between then and now, but I hit a snag and, true to form, got discouraged and put it on the back burner.
I'm back in full force now. I finished all of the curtains and installed them. Now the sun is not beaming in like crazy and fading everything in sight. Hanging curtains before the walls are done is really not the proper way to go about a redo, but it was something that I could accomplish (once I got past my snafu and solved the problem on how to hang the curtains) and I needed to see some progress so that I could feed off it and get going on another part.
I've started the kitchen backsplash. The one thing that was holding me back on that was the indecision about putting up the backer board for the tile. I thought I was going to have to take down the paneling and expose the studs, but I thought to consult builder Nephew and he said, "don't take it down". Yay! Just what I wanted to hear. His suggestion was to pull off the wallpaper and use Liquid Nails to glue the backer board onto the wall.
I watched a tutorial on how to cut backer board (or hardy board). On the simple straight cuts, I just scored it, then snapped it apart. On the trickier cuts, I used a jigsaw. I'm kind of afraid of power saws, but I bravely overcame it and got all my pieces cut out. Nephew showed me how to glue the pieces to the wall and put a few screws to hold it in place while it dried. I finished it up this morning and am now ready to work on my tile design.

I'm back in full force now. I finished all of the curtains and installed them. Now the sun is not beaming in like crazy and fading everything in sight. Hanging curtains before the walls are done is really not the proper way to go about a redo, but it was something that I could accomplish (once I got past my snafu and solved the problem on how to hang the curtains) and I needed to see some progress so that I could feed off it and get going on another part.
I've started the kitchen backsplash. The one thing that was holding me back on that was the indecision about putting up the backer board for the tile. I thought I was going to have to take down the paneling and expose the studs, but I thought to consult builder Nephew and he said, "don't take it down". Yay! Just what I wanted to hear. His suggestion was to pull off the wallpaper and use Liquid Nails to glue the backer board onto the wall.
I watched a tutorial on how to cut backer board (or hardy board). On the simple straight cuts, I just scored it, then snapped it apart. On the trickier cuts, I used a jigsaw. I'm kind of afraid of power saws, but I bravely overcame it and got all my pieces cut out. Nephew showed me how to glue the pieces to the wall and put a few screws to hold it in place while it dried. I finished it up this morning and am now ready to work on my tile design.

Other posts on the trailer-to-vardo transformation are here
Saturday, October 24, 2015
Are Hyacinth Beans Edible?
Since I didn't have much growing in the garden this year, I put a few Hyacinth Bean seeds in the ground just to see how they'd do. I grew the vine at our last house and I loved it because it was always so lush and beautiful. But, since we've moved out here, I've tried to get it to grow on a trellis and the fence, but it hasn't done well.
It really took off in the garden plot and is producing beautiful, shiny, purple pods like crazy. I've always wondered if they were edible, but was afraid to try them because I thought they might turn my mouth purple, or worse, kill me.
So, I did some searching on the internet and was assured that if you eat the fresh pods, they are perfectly harmless, although, eating the dried bean is a different story. When the beans are mature and the pod dries up, the bean contains a toxin. They can still be eaten, but they have to be cooked twice, changing the water in between cooking so that the toxin can be released, boiled, and poured away.
I finally got up the nerve to try them, and, ugh. NOT GOOD!

It really took off in the garden plot and is producing beautiful, shiny, purple pods like crazy. I've always wondered if they were edible, but was afraid to try them because I thought they might turn my mouth purple, or worse, kill me.
So, I did some searching on the internet and was assured that if you eat the fresh pods, they are perfectly harmless, although, eating the dried bean is a different story. When the beans are mature and the pod dries up, the bean contains a toxin. They can still be eaten, but they have to be cooked twice, changing the water in between cooking so that the toxin can be released, boiled, and poured away.
I finally got up the nerve to try them, and, ugh. NOT GOOD!

They are this nice beautiful purple color when they start out. I thought they'd look so pretty on the plate with my baked salmon and herbed rice. But, when I steamed them, they lost their color and turned into an icky greenish-grey color.
I was determined to answer the question for myself of whether or not they were edible, so I went ahead and served them up.
The answer is, YES, they are edible...if you mean by "edible" that "they won't kill you". Tom and I both ate them and suffered no ill effects. But, aside from the creepy color, they did not taste good. I was expecting the taste and texture of a snow pea pod (which is one of my favorite veggies), but it was nothing like that. Only the smallest, flattest ones were tender. The taste wasn't putrid, but it wasn't good. The texture was the worst, although Tom didn't notice it. But, I'm more of a food texture person than he is. Anyway, they had a fuzzy texture. Almost like a peach fuzz texture, except not in a good peachy way.
So, yeah, you can eat Hyacinth Beans....if you're starving.
More Flooding
Remember the flooding we had in the spring that washed away the pond spillway? Remember the installation of the culverts that was supposed to prevent another such incident? Well, so much for that. This is our pond spillway now.
The water went through, around, and over the culverts, washing away the soil and the new grass that had sprouted. Tom tried, futilely, to brace it up with sandbags. Some of them were just tossed downstream like driftwood.
It started raining Friday morning and hasn't stopped. It's now 10:30 Saturday morning and we've gotten about 16 inches of rain so far. It's supposed to rain until Sunday morning.
Those two things that look like logs are the culverts that were covered with soil and new grass. Since Tom took this video, the soil has eroded away all the way to the front of the culverts. They're just useless pipes lying there now.
Saturday, October 17, 2015
Chicken Coop Remodel, or How Not to Build a Chicken Coop (2)
To read day one of the chicken coop remodel, go here.
The chickens were completely freaked out by the changes to their home. The first night, many of them wouldn't even go in the coop. They tried roosting in the mower shed and on top of the coop yard fence. I had to catch them and put them in the coop for the night.


The chickens were completely freaked out by the changes to their home. The first night, many of them wouldn't even go in the coop. They tried roosting in the mower shed and on top of the coop yard fence. I had to catch them and put them in the coop for the night.

In the morning, the chickens are usually out of the coop and clamoring around the gate waiting to be let out. But after the first night of the remodel, I went to open up the coop to get started on the walls and all of the chickens were just sitting on the roost, apparently afraid to jump down onto the new floor. I finally coaxed and shooed them out the door.
On day two, we put the linoleum on the floor and put the ceiling up and started on the walls. On day three, we finished all of the walls. I didn't take pictures of any of that because, frankly, I was too exhausted to care about pictures.
On day four, Tom had to go out of town and I spent the day painting the walls and ceiling.

I bought some mis-tinted paint at a local surplus store, exterior latex. The first coat was a very light lavender. I covered that up with a second coat of white. I left the corner support poles unpainted because they're old creosoted telephone poles. I hung a couple of cup hooks on the wall to store some cleaning supplies. Little whisk broom for sweeping away cobwebs and such. My hope is to do a little regular maintenance so that the filth doesn't build up to an unmanageable level like before.

It won't win any beauty contests, but I think this set up is going to make life a bit easier for us. The neat freak in me wants to caulk every seam and corner, but chicken coops need plenty of ventilation, so I don't want to seal it all up and make it airtight. We left a big space in the ceiling open so the air can circulate up through the rafters. We're going to cover that space with half inch hardware cloth so that it's snake proof, but will still allow airflow. Still to come...a new, easier to clean roost and sand on the floor instead of the hay that we've been using as litter. (Do a google or Pinterest search on using sand. There are a lot of positive things about it, so we're going to give it a try).
Chicken Coop Remodel, or How Not To Build a Chicken Coop
Remember when we first moved to the farm? Oh, how bright-eyed and naive we were. Remember the Chicken Palace? Well, it's not so palace-y anymore. We built our chicken coop before the days of Pinterest and endless pictures and tutorials about chickens and beautiful, functional coops. And, we pretty much didn't know what we were doing. These days, this is what our coop looks like on the inside.
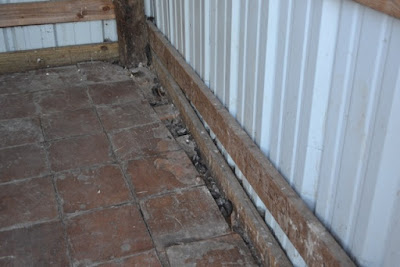


Poop and filth in every nook and cranny. This is so hard to clean. At the time, it seemed like such a good idea to use the R-panel tin for the walls. And, yes, it has served us well since 2009. But, ugh, it is almost impossible to clean.

The tile floor that I originally laid (using the saltillo tile that we took out of the house) has held up well in the middle, but all around the edges, the smaller pieces of tile have been dislodged by gophers or moles digging tunnels underneath and the chickens scratching around for bugs and such.

I don't know if that's a rat nest of a bird nest, but I know that I don't want it there. And spiders...eek, the spider webs are everywhere.

Snakes have such easy access that this one felt at home enough to take it's coat off and stay a while. There are lots of crevices where they can hide and even if we can find them, sometimes we can't reach them to get them out.

Tom was usually the one to clean the coop, but it's such an onerous task that it wasn't done nearly enough. Even so, he was reluctant to go along with my plan to remodel the coop. I finally talked him into it and went to buy supplies. My plan was to put in a proper floor that we could cover with linoleum and put in proper walls to seal off all the hidey holes.

Floor joists, first.

This was a hard project. Not only did we have a sloping roof that we had to cut the plywood to fit at the proper angel, we had these corner poles that we had to fit the floor around. It was a challenge.

But, with Tom's mad trigonometry skills, we managed to get through it with few errors.

Although, the circles were the worst.

Almost fits.

This one we cut far too big. Tom filled in the gap with the pieces we cut off.

The fourth time's a charm.

We finished the floor on the first day.
Subscribe to:
Posts (Atom)

 Posts
Posts