Welcome to Legal Tender Farm

Welcome to Legal Tender Farm

Saturday, July 20, 2024

Laundry Room Redo #4


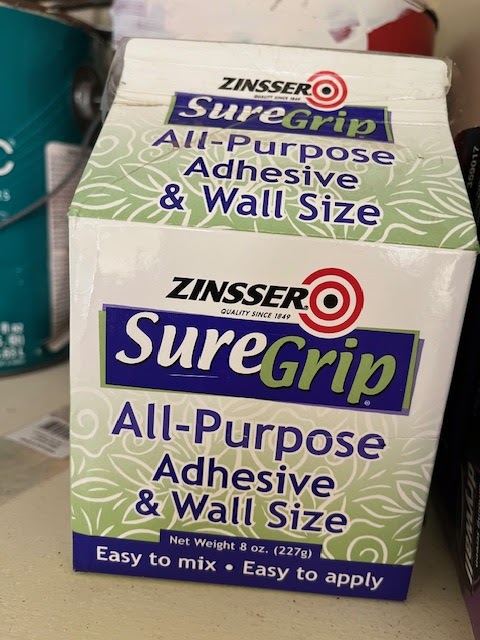
 Oops, I forgot to take pictures of steps along the way. But it's boring anyway. I primed the crown and painted the room Sherwin Williams Really Teal. The most fun and most satisfying part was putting the wallpaper in. I used peel and stick from Lowes. I ain't gonna lie, it was not easy. I still had to size the area because it was drywall. Our small town was pretty much lacking in sizing products. And I didn't know anything about sizing, except that I needed it. I ended up finding one sad little box of Zinsser powdered wallpaper paste/wall sizing in an old small-town hardware store. Even the staff there didn't know they had it or what it was. The box had been opened and then taped shut. But I didn't care. I wanted my wallpaper on and I wanted it on now. 

The package says "easy to mix", but it was nearly impossible to mix. At first, I just put the powder in a bowl and added the water like the instructions say. But I quickly saw that was not going to work. It was like making a roux or gravy and just dumping the milk into the flour/butter mixture. Lumps galore. So I tried mixing it with my blender. Still didn't work. I decided to start over and add the water a bit at a time, like you would for a roux. But that didn't work either. I finally just stuck my hands in there and smashed the lumps the best I could through a sieve. I did finally get it smooth enough to use. The instructions also say to apply with a roller. What a mess that was. It was so runny, it was like just rolling on water. Drips everywhere.

I waited until the next day to start applying the wall paper.


Myy first piece ended up perfect.


Second piece and little corner piece turned out pretty good, too.


This corner was a bear. The ceiling has some old damage on it that made the wallpaper bunch up. But I soldiered on and, while not perfect, it still looks good. And, who's gonna be looking up in that corner anyway?


Husband helped me install the very heavy solid walnut shelf above the cabinet. I was able to store a bunch of jars on it that were taking up cabinet space.

The cabinet is an old pie safe, probably from the late 1800's/early 1900's. It's pretty rustic. But perfect for the room.

Next up, the pull-down closet rod above the dryer.


Now I have the dreary task of painting the cabinet doors. I'm trying to decide if I should completely strip them of the oil-based paint, or sand, prime and paint. I'm leaning towards stripping. I think they'll look better in the end.


Friday, July 05, 2024

Laundry Room Redo #3

I finished up the crown moulding this morning. There was just this piece and one other left to do. But it took all morning. To avoid going and buying two more pieces of moulding, I had to make what was called a scarf joint. I watched a few YouTube videos to figure it out.


First of all, on this piece, the left side has an angle in the wall that is approximately 16 degrees. I made no less than ten trips down to the barn to make just the right sample cut so that the moulding would fit together at that angle in the wall. It turned out that a 13 degree cut is what was needed to match up with the 16 degree cut that I had already cut and installed yesterday. 


This is the 16 plus 13 degree angle cut. Don't ask me why this worked. It just did. The ceiling has some old damage there on the left, which threw the moulding out of whack a little bit. Nothing a little caulking won't fix. I added a little shim on the top to keep it from shifting when I nailed it on.


Then I had to make the scarf joint cuts, which was both pieces cut at a 22.5 degree angle. That wasn't very hard. It's a thing of beauty when it turns out perfectly. Then I had to make the 45 degree cut for the right side corner. 
 

The moulding at the top of this cabinet was the very last piece to install. It had a 45 degree angle inside corner on the left, a scarf joint to the left of center, and a 45 degree angle outside corner on the right. The inside corner was a little tricky. It wasn't fitting just right, so I pushed the saw a little further than the 45 degree mark and that was the sweet spot for this cut. The outside corner was a perfect 45 degree cut. Figures...it was my very last piece.

Then it was time to caulk. Everything is done and it's ready to be primed.

Yay!


Wednesday, July 03, 2024

Laundry Room Redo #2

 I've been hard at work. 

It always gets worse before it gets better. I've sanded and primed everything with this grey Zinser Bull's Eye primer. Don't believe it when they tell you it makes latex stick to oil paint. I sanded the cabinets and washed them with TSP. But still the primer will just scratch off. I don't know what to do about that.

Grey primer on walls as well. I figured the dark teal paint that I've chosen will go better over a darker primer instead of painting over antique white.

I'll be leaving the door off of this cabinet and it will be open shelving. I didn't want it to look unfinished and to see all the junk on the other side. So I used a closet shelf that I took out of one of my reorganized closets, and happened to be exactly the depth that I needed. I cut it in two pieces and used it it as a new shelf wall. I'll prime and paint those, too. Just learning how to use husband's saw was a chore. He ended up cutting it for me. I guess he's afraid I'll cut my hand off or something.


So, today I thought I'd learn to cut crown moulding. Ha. It's so tricky. Who ever figured out how to do it is a genius. I've watched multiple videos trying to learn how. You've heard "measure twice, cut once". Well, try "measure 15 times, flip the moulding over 10 times, readjust miter saw 6 times. Cut moulding and still get it wrong.


It's hard to tell, but this was my first attempt. It was a hair long, so I took it back to the saw and shaved a bit off the end. I was pleased with the outcome and it fit well. But after I cut the inside corner for the next piece, they didn't fit well together. I finally figured out that the corner is not exactly square. So at this point, I am frustrated and need a break. I'll need to figure out how to adjust the miter just a tiny bit so that the corners fit together.


Oh, hullo, peel and stick wallpaper. Just arrived in mail today. I love it. Guess where it's going to go?